

Are you ready to take your forms to new heights? After research and user feedback, we’re happy to introduce our redesigned form section impacting Contact, Company, and Application forms as well as some new functionalities when adding a custom field. Let’s deep dive in and cover the redesigned and new features.
Set Your Custom Field Preferences in the Modal
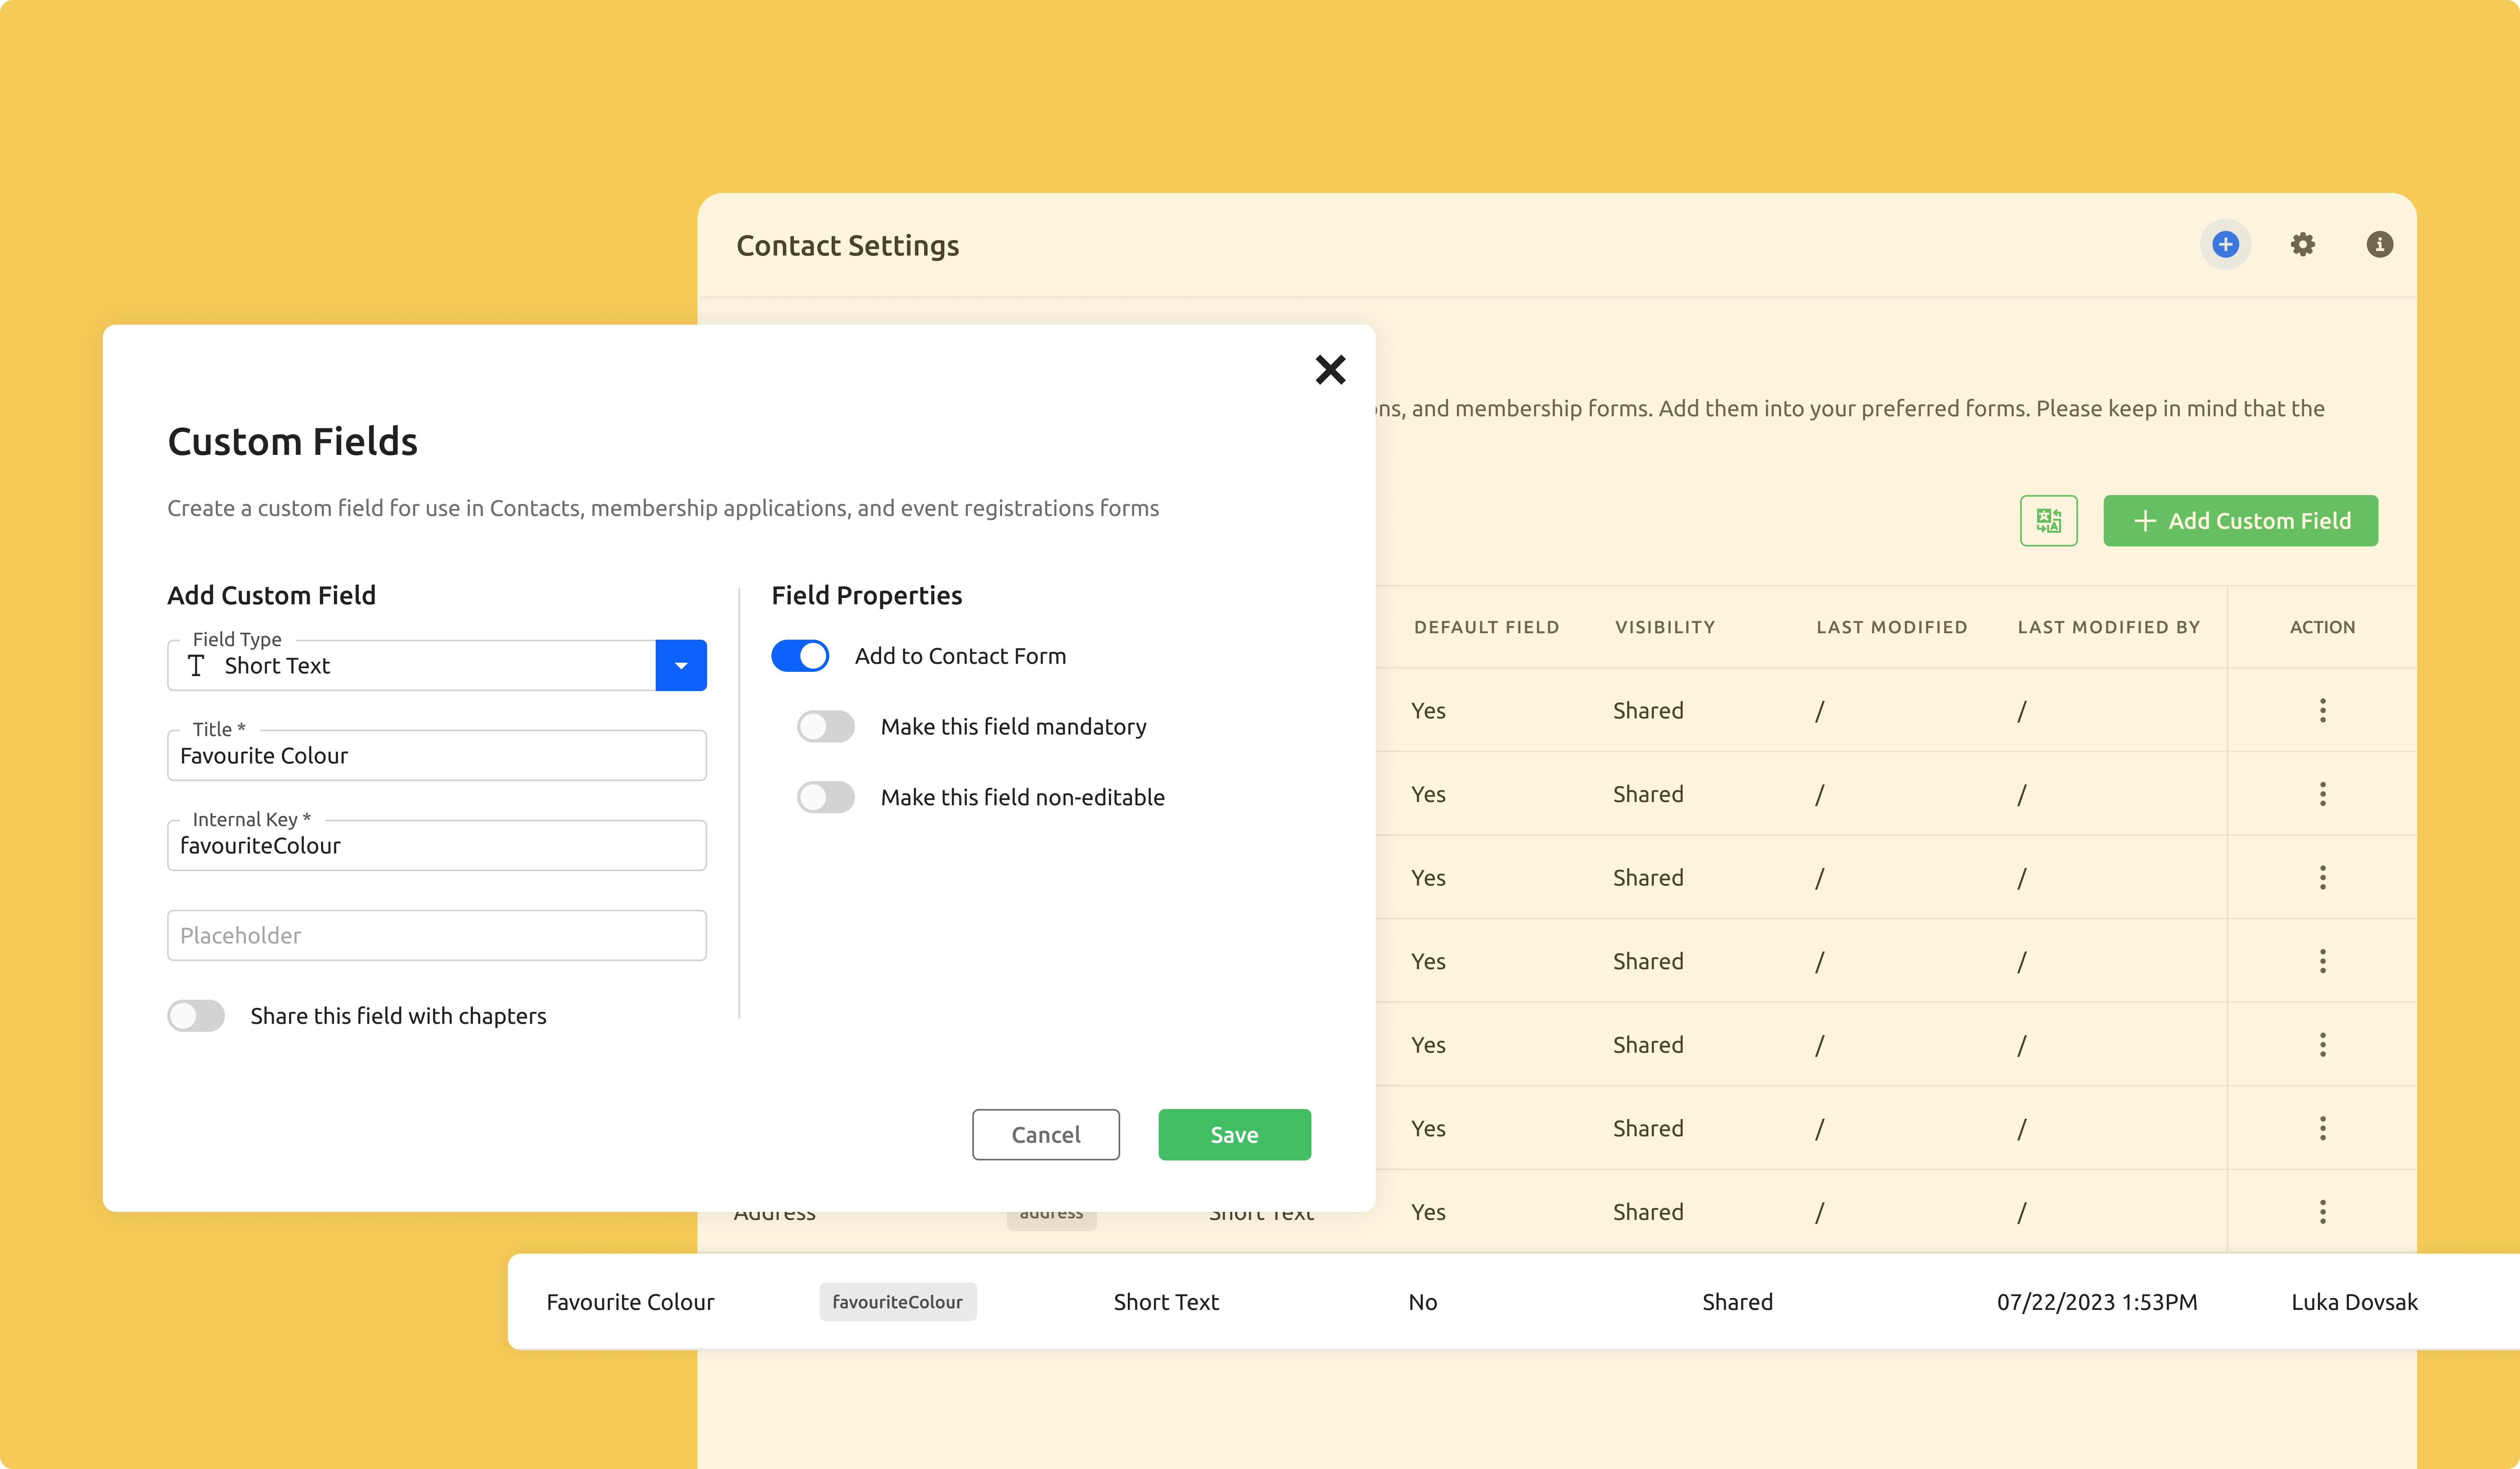 In the ‘Field Settings’ table view, we’ve added a new column ‘Default Field’ indicating whether the field is a system default (‘Yes’) or is a custom field created by you (‘No’). In this way, we can avoid creating duplicated fields. In the example above you can see the newly added custom field is ‘Favourite Colour’.
When creating a custom field we’ve added options to manage field properties, all from one place:
- ‘Add to Contact Form’ - you can now add the field directly to the contact form without manually adding it inside the form itself;
- ‘Make this field mandatory’ - input from the user is required to submit the form;
- ‘Make this field non-editable’ - event attendees or members can’t edit the form during the registration or membership application process;
- ‘Share this field with chapters’ (only applicable to Chapter Organizations).
New Way of Building Forms
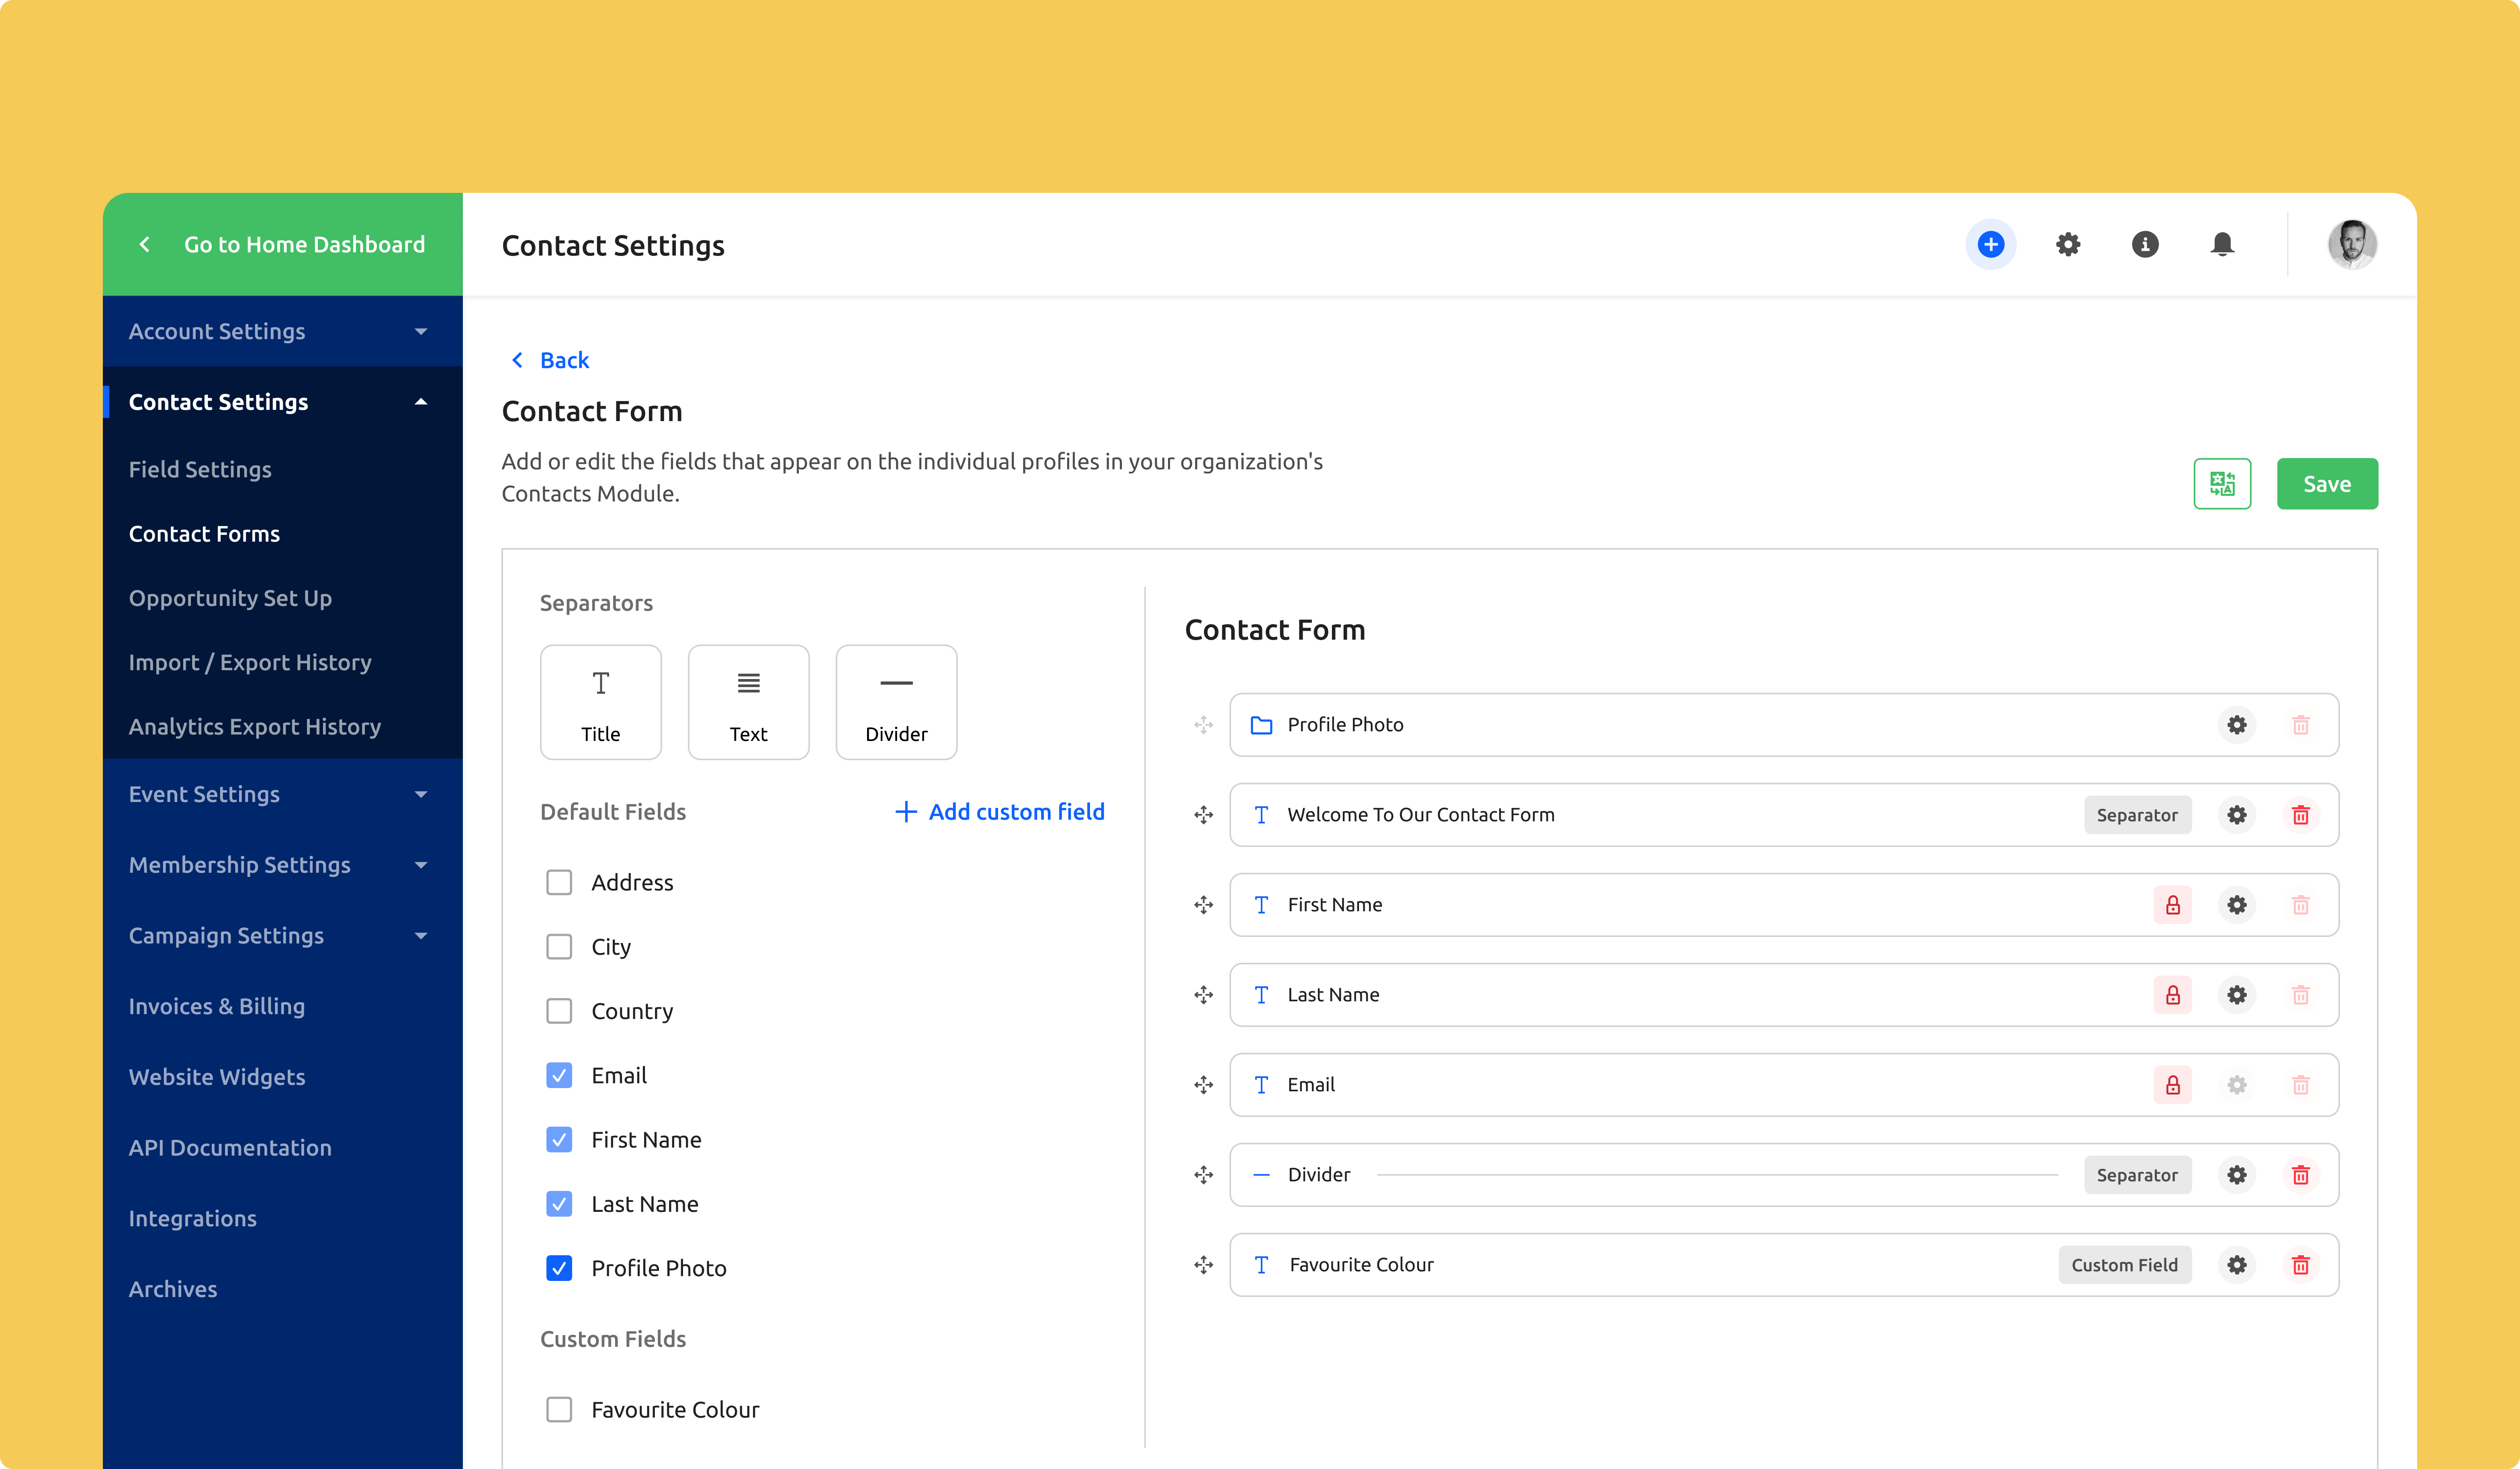
The creation of forms was redesigned as well as how you organize them. In the above example, we have two sections to take into consideration while building a form.
On the left side, we have all the default and custom fields as well as separators (title, text, divider). All the fields are arranged alphabetically. Once you enable the field by clicking on the ‘checkbox’ in front of it, the field will appear on the right side.
On the right side of the layout is the ‘Contact Form’ organization where you can rearrange the order of the added fields and separators. Let’s have a look at what each icon means and does.
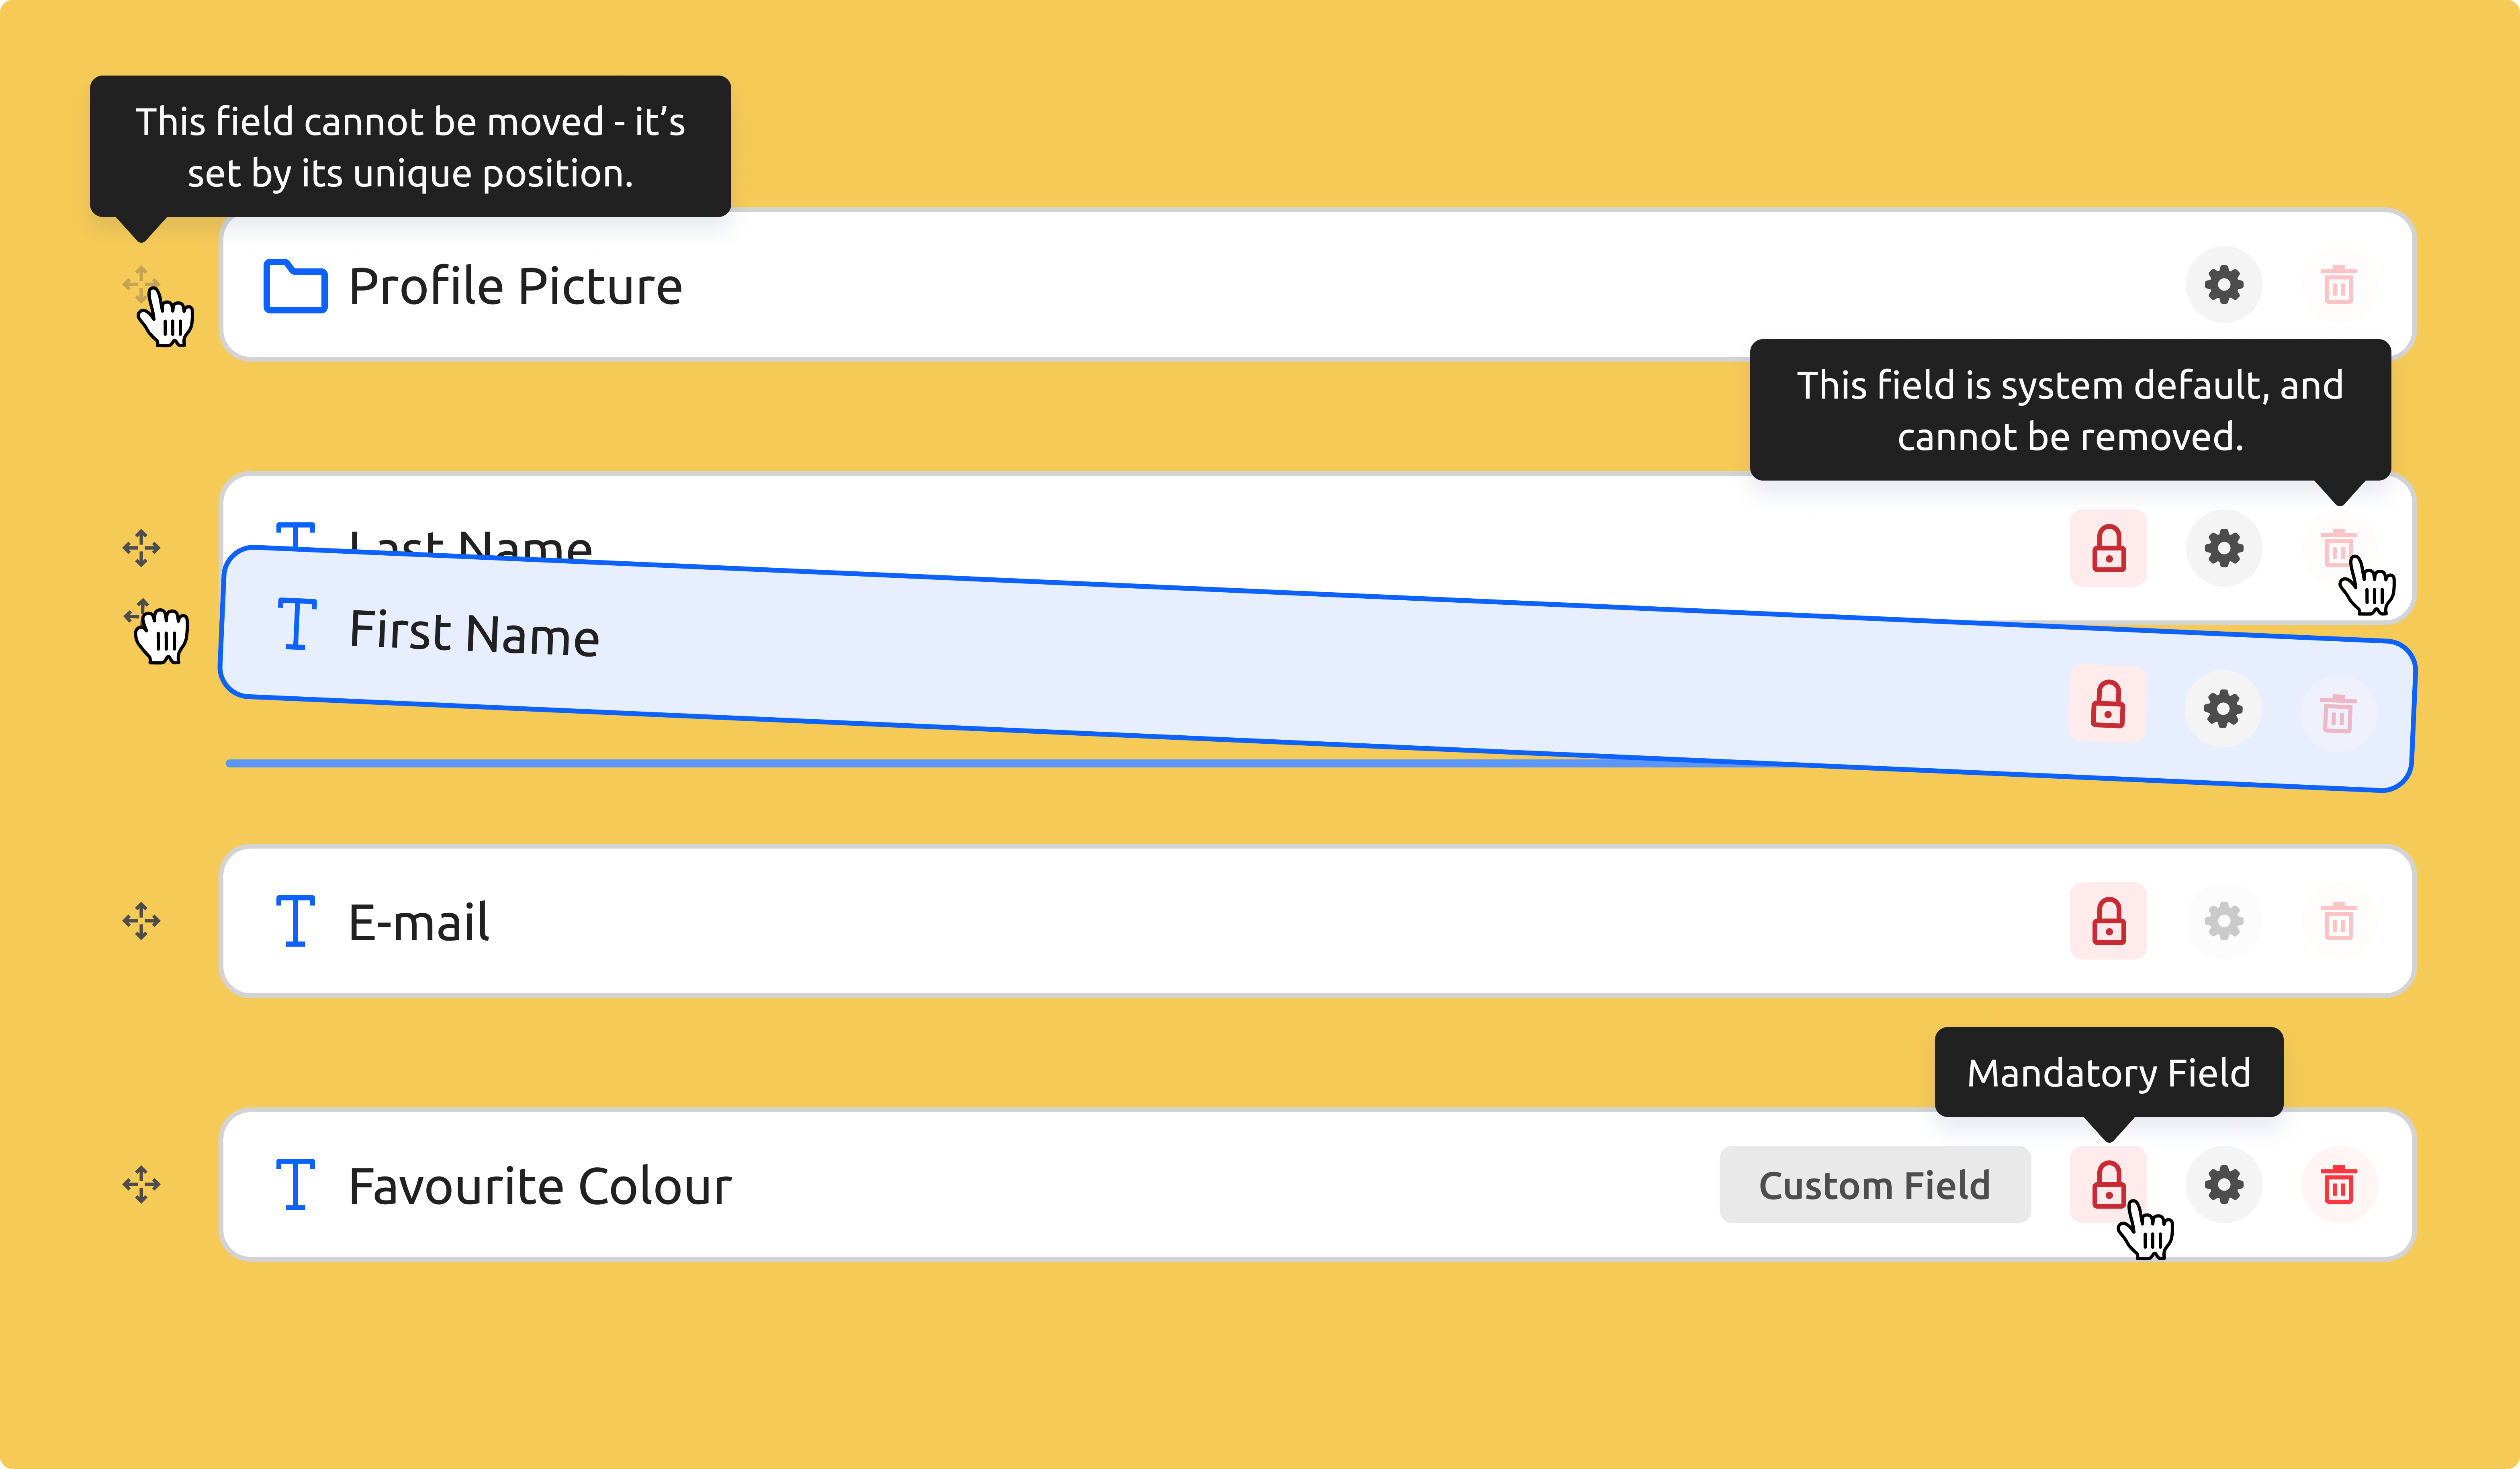
- ‘Reposition’ - by clicking on the icon, you can reposition the field in the order you think it’s best inside your form;
- ‘Mandatory Field’ - this icon refers to the set preference of input from the user required to submit the form;
- ‘Settings’ - by clicking on this icon, you will be able to edit the field preferences (mandatory field, characters limitation, etc.). Some fields cannot be edited since their system defaults (eg. ‘E-mail’);
- ‘Remove’ - click on this icon if you would like to remove the field from the form.
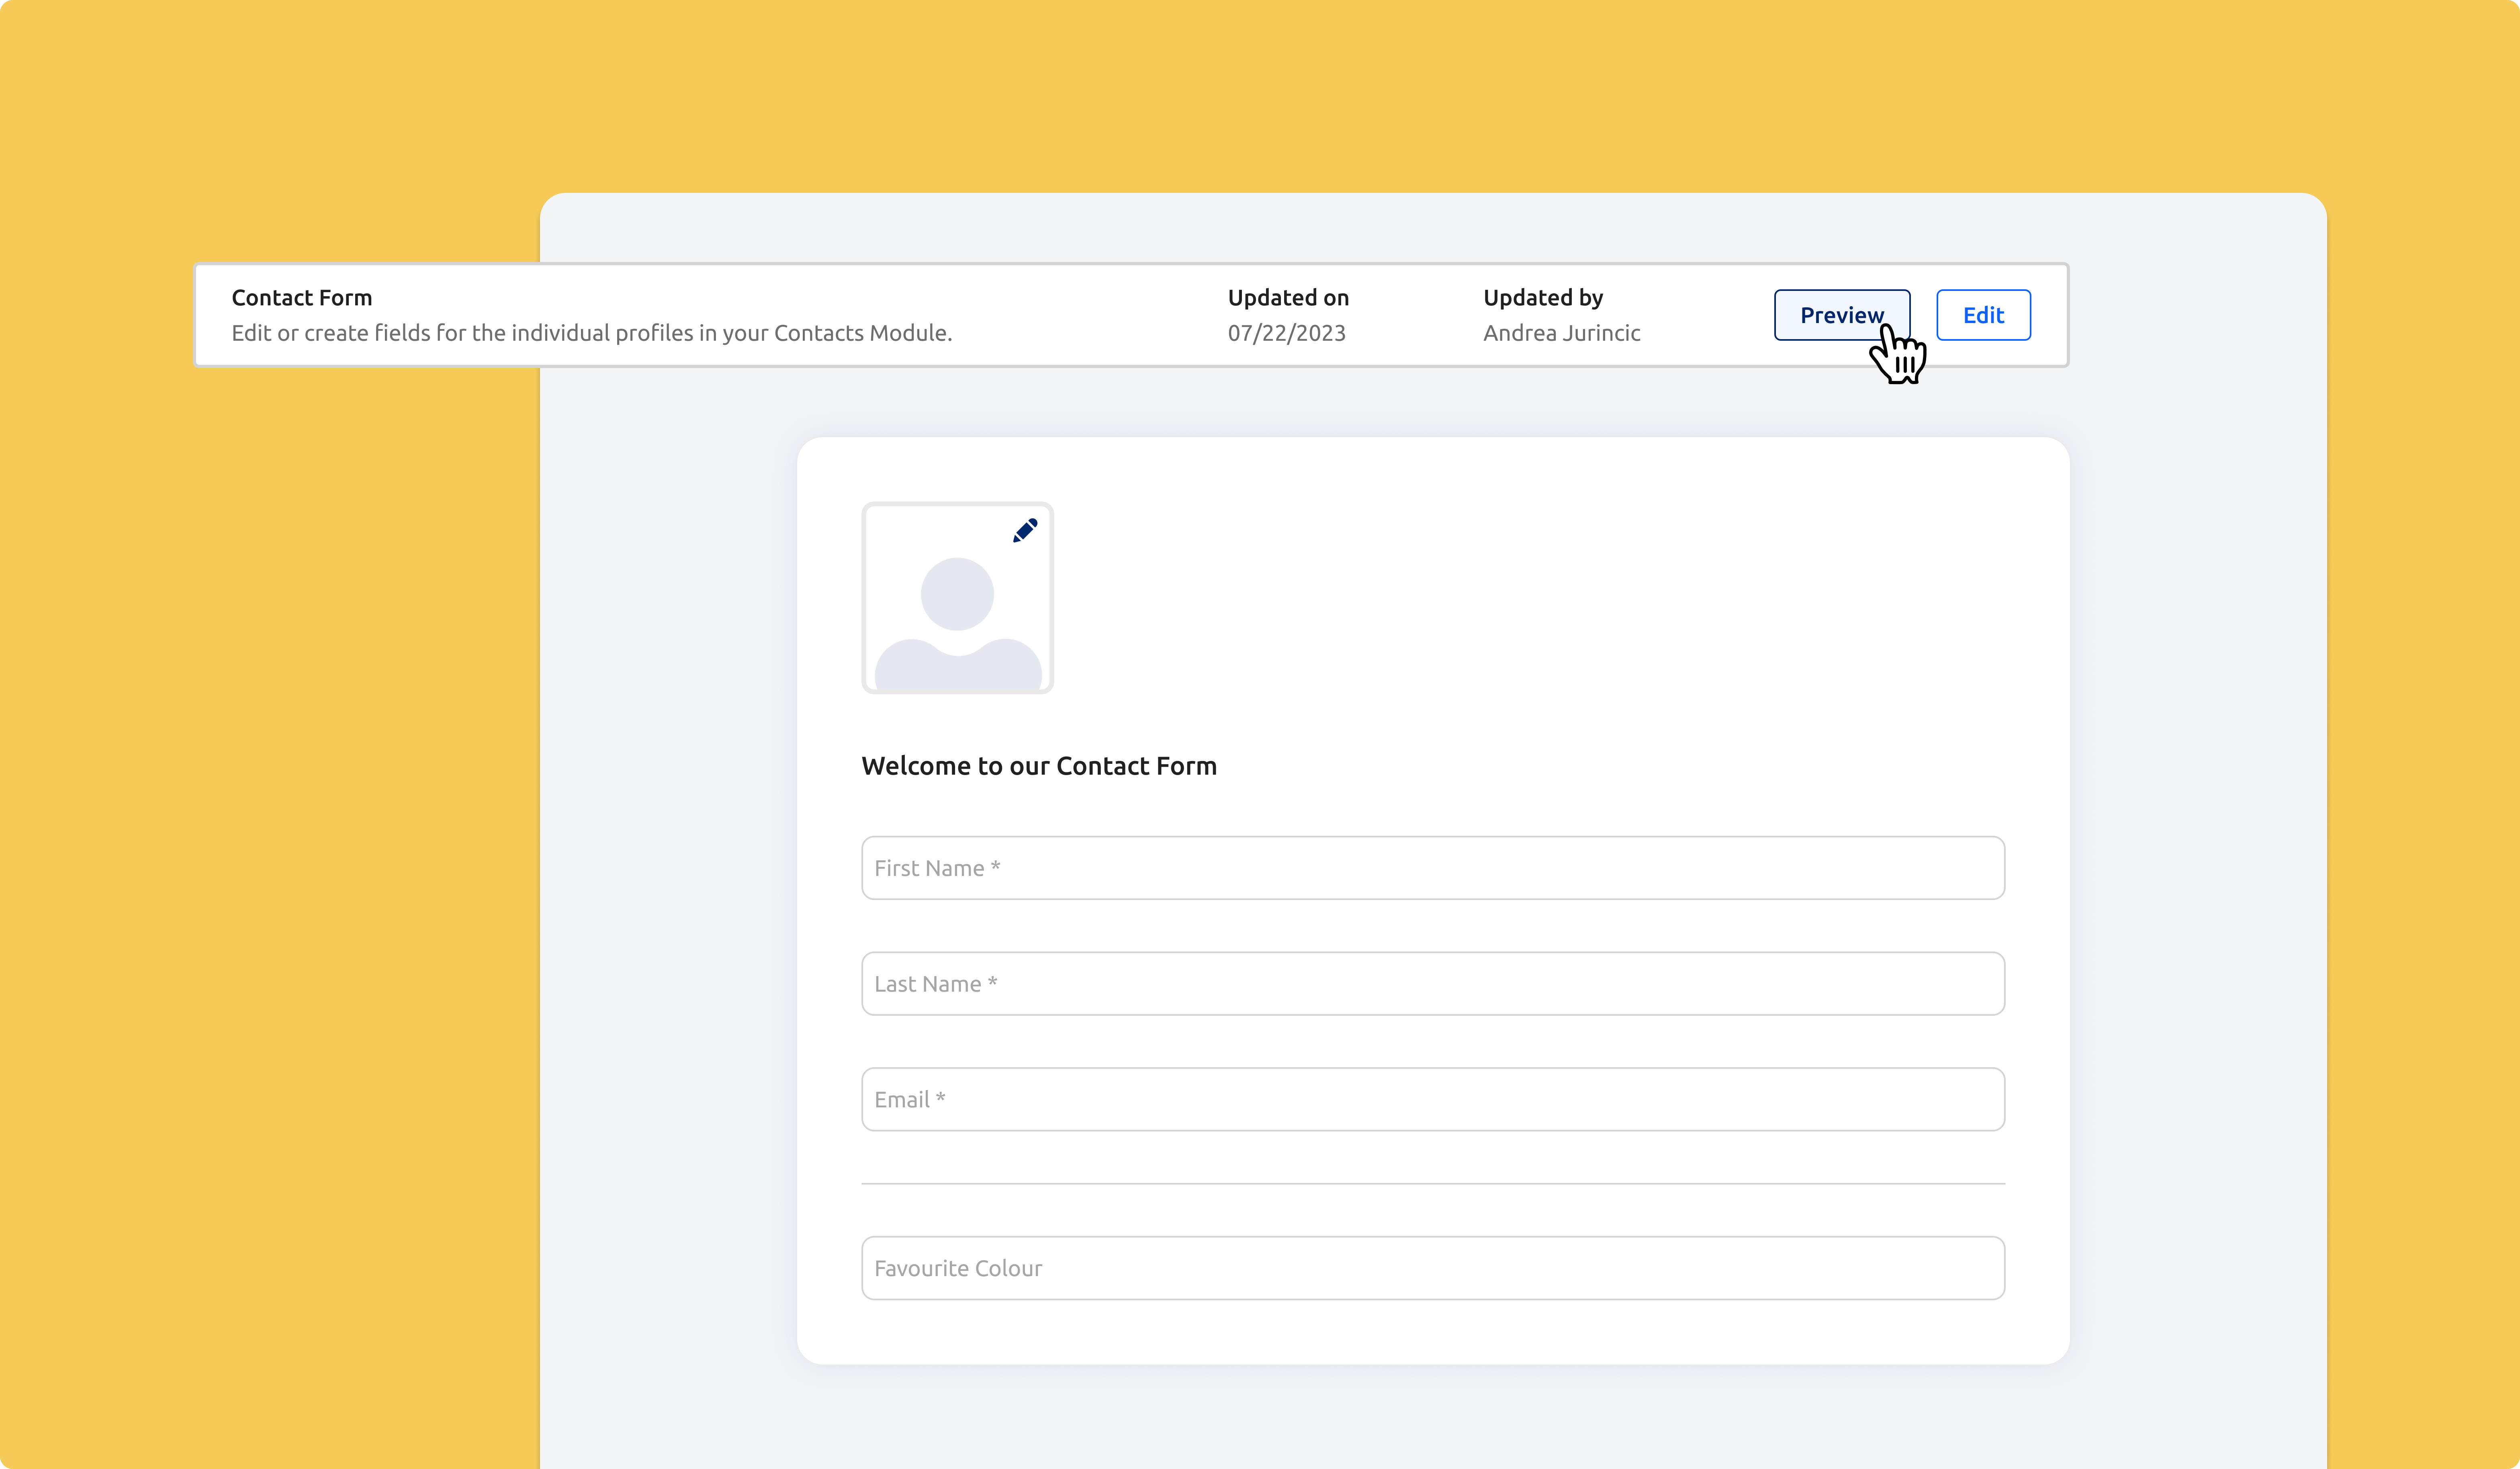
Preview your newly created form
Once you’re satisfied with the results click on the ‘Save’ button, go back to the ‘Contact Forms’, and click on ‘Preview’. Don’t forget to save all the changes done before previewing the form. In case you don’t save, your latest updates on the form won’t be visible.
Stay Tuned!
With these redesigned and new form features, we believe it should help ease the creation of forms. We’re always looking to make your experience of using Glue Up better. We’ll keep you updated as we ship more improvements.
For any questions, as always, reach out to our Customer Support. To learn more about Glue Up and how it can help your Organization, book a free demo today.


